Mastering Stovetop Popcorn: Your Guide to Perfect Dutch Oven Popcorn
There’s truly nothing quite like the irresistible aroma and satisfying crunch of freshly popped popcorn. Forget the microwave bags and expensive movie theater snacks; creating fluffy, salty, and buttery popcorn right on your stovetop, especially in a Dutch oven, is a simple pleasure that elevates any snack time. This comprehensive guide will teach you the secrets to achieving perfectly popped kernels every single time, turning a humble ingredient into a gourmet treat.

Why a Dutch Oven is Your Secret Weapon for Stovetop Popcorn
For generations, home cooks, including my grandmother, have relied on Dutch ovens for making the best popcorn. This classic kitchen tool is uniquely suited for the task, offering advantages that microwave bags simply can’t match. Once you try this method, you’ll likely never look back!
- Superior Heat Distribution: The heavy construction of a Dutch oven, whether cast iron or enamel-coated, ensures that heat is distributed incredibly evenly across the bottom and sides. This uniformity is crucial for popping kernels at the same rate, resulting in fewer unpopped kernels and preventing scorched popcorn.
- Excellent Heat Retention: Once heated, a Dutch oven maintains a consistent temperature. This steady heat is key to a continuous popping process, which helps achieve that desirable fluffy texture.
- Ideal Shape and Size: The deep sides of a Dutch oven provide ample space for the popcorn to expand without overflowing. A snug-fitting lid is essential for keeping the steam and heat inside, maximizing the number of popped kernels. While any lidded pot works, a Dutch oven offers optimal results. (A clear lid is a fantastic bonus, allowing you to watch the magical transformation!)
- Durability and Longevity: High-quality Dutch ovens are built to last a lifetime, making them a wise investment for any kitchen. I personally cherish my Chantal Dutch oven, a brand that has stood the test of time in my kitchen for over 20 years. It’s a testament to their exceptional quality and performance.
While I had initially planned to share a more elaborate recipe, like a ham or brisket, using my new Chantal Dutch oven, the challenges of sourcing specific meats during a recent pandemic shifted my culinary focus. Instead, I’m excited to present a recipe that’s universally loved, incredibly budget-friendly, and perfect for families: stovetop popcorn! It’s an easy, filling snack, especially for those of us with kids at home who seem to constantly be hungry.

The Simplicity, Savings, and Health Benefits of Homemade Popcorn
This week, I’m embarking on a delightful journey into the world of popcorn with a series of gourmet popcorn recipes, all building upon this fundamental Dutch oven method. You’ll be astonished by the sheer volume of popcorn you can produce from a humble 2-pound bag of kernels, which typically costs a mere two dollars at most grocery stores. Most of these recipes require just five minutes or so of active preparation, making them incredibly convenient and a fantastic alternative to store-bought options.
Get ready to explore exciting flavor adventures with upcoming recipes like Salted Caramel Pecan Popcorn, the delightful Dutch Oven Kettle Corn, the surprisingly tasty Homemade Dill Pickle Popcorn, and the utterly addictive Smoky Bacon Popcorn. But before we dive into these creative toppings, let’s ensure we’ve mastered the foundational skill: crafting perfect, basic stovetop popcorn.
Essential Ingredients for Your Stovetop Popcorn Masterpiece
Making popcorn on the stovetop might seem a little old-school, but it’s remarkably easy and yields far superior results compared to microwave versions. Gather these simple ingredients, and you’ll be well on your way to a fresh, delicious batch in no time:
-
A Large Lidded Pot, such as a Dutch Oven:
As highlighted, a heavy-bottomed pot like a Dutch oven is unparalleled for its even heat distribution and ability to maintain temperature, preventing hotspots and burning. Its ample volume also allows for a generous yield of fluffy popcorn. A lid, especially a clear one, is crucial for both containing the popping kernels and observing their progress.
-
A Mild-Flavored Cooking Oil with a High Heat Smoking Point:
The choice of oil significantly impacts your popcorn’s flavor and texture. Opt for oils like coconut oil (which imparts a subtle, pleasant sweetness), vegetable oil, or canola oil. These oils have high smoke points, meaning they can reach the necessary popping temperature without burning and creating off-flavors. Avoid extra virgin olive oil, as its lower smoke point is not suitable for this method. For a distinctly savory and rich popcorn, consider using bacon grease, a technique we’ll delve into with our Smoky Bacon Popcorn recipe.
-
Good Quality Popcorn Kernels:
The freshness of your kernels makes a difference. Whether you prefer the classic yellow kernels (which tend to pop larger and fluffier) or the more tender white kernels, ensure they are stored in an airtight container in a cool, dark place. Older kernels tend to have less moisture, resulting in more “old maids” (unpopped kernels).
-
Kosher Salt or Seasoned Salt:
Kosher salt, with its larger flakes, adheres beautifully to the popcorn, providing a pleasant burst of saltiness. Seasoned salt (like Lawry’s or a homemade blend) can add an additional layer of complexity and flavor. The key is to add the salt at an early stage with the hot oil, which helps it distribute more evenly throughout the entire batch, seasoning each kernel as it pops.
-
Regular Salted Butter:
A drizzle of melted butter is the quintessential finishing touch for perfect popcorn. Using salted butter enhances the overall savory profile, but unsalted butter can also be used if you prefer to control the saltiness independently. Adjust the amount of butter to your personal preference – some like just a hint, while others prefer it drenched!

Step-by-Step Guide to Achieving Perfectly Popped Dutch Oven Popcorn
Follow these meticulously detailed steps to transform simple kernels into the most satisfying homemade popcorn you’ve ever tasted:
-
Prepare Your Pot and Test Kernels:
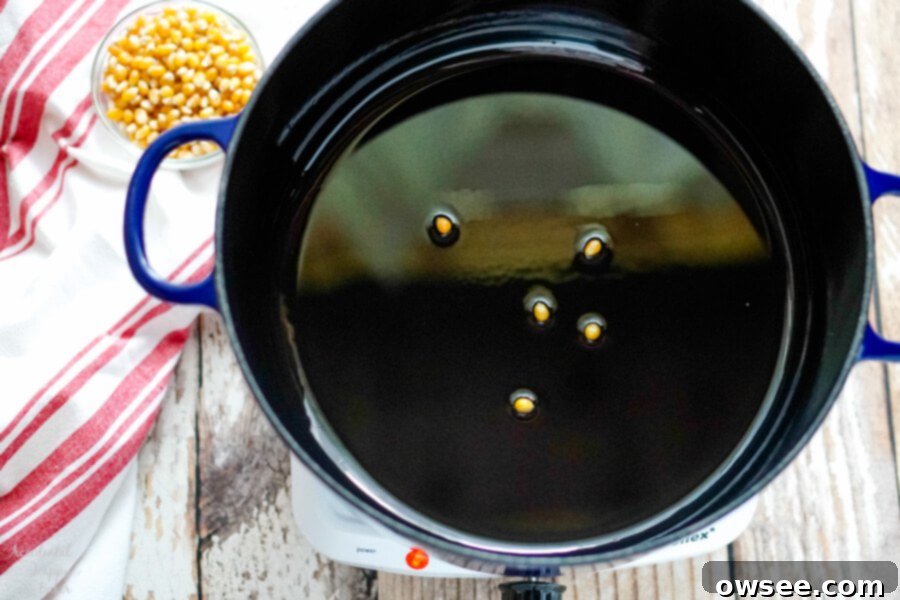
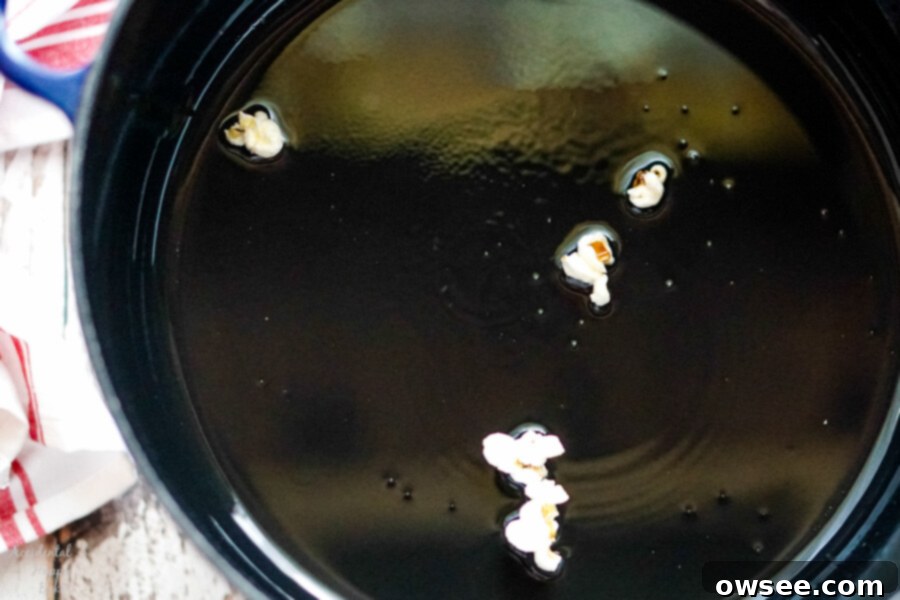
Begin by adding 2-3 tablespoons of your preferred cooking oil to your Dutch oven. Drop in just 3-4 popcorn kernels. Cover the pot securely with its lid and place it over medium heat. These initial kernels act as your “test subjects,” indicating when the oil has reached the precise temperature for optimal popping. This usually takes about 2 minutes. Listen intently for those first few pops!

-
Add the Remaining Kernels and Salt:
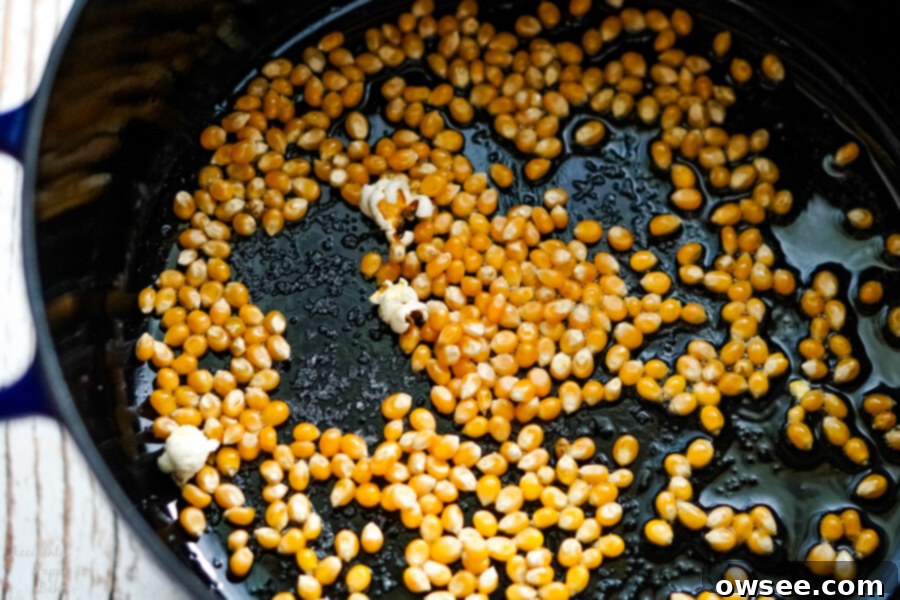
The moment you hear those test kernels pop, immediately remove the Dutch oven from the heat. This brief pause is critical to prevent the oil from overheating and burning the subsequent kernels. Quickly lift the lid and add ½ cup of popcorn kernels along with ½ teaspoon of kosher or seasoned salt to the pan. Promptly replace the lid and return the pot to medium heat. Adding the salt at this stage, while the oil is hot and before the main popping begins, helps the salt adhere more effectively to each kernel, ensuring even seasoning throughout the entire batch.

-
Master the Popping Process:
Keep the Dutch oven on medium heat and stay close by. The main popping phase typically lasts 2-3 minutes. To ensure all kernels are exposed to heat and to prevent burning, shake the pan gently but consistently every 30-60 seconds. For truly crispy popcorn, once the popping becomes rapid, slightly vent the lid by shifting it slightly ajar. This allows steam to escape, preventing your popcorn from becoming soggy. When the popping sounds begin to slow down significantly (to about one pop every 2-3 seconds), remove the pot from the heat immediately. Crucially, leave the lid on for an additional 15-20 seconds. There are always a few “late bloomers” that will pop, and this extra time prevents them from jumping out and potentially burning you.

-
Serve and Enhance with Butter:
Carefully remove the lid and transfer your perfectly popped popcorn to a large serving bowl. For an extra touch of indulgence, add 1 or 2 tablespoons of butter (or more, if desired!) directly into the still-warm Dutch oven. The residual heat will quickly melt it. Pour the melted butter evenly over the popcorn, toss gently to coat, and enjoy your incredibly delicious, homemade stovetop popcorn! Feel free to add an extra pinch of salt or your favorite seasonings at this stage.
Dealing with “Old Maids” (Unpopped Kernels)
Let’s address a common truth about homemade popcorn: no matter how perfectly you follow the steps, it’s virtually impossible to achieve a batch without a few “old maids” – those stubborn, unpopped kernels. In my experience, many elaborate tips designed to eliminate them often add unnecessary complexity and time to the cooking process without significant improvement. My best and simplest advice? When transferring the cooked popcorn to your serving bowl, use a large slotted spoon. This clever trick allows the fluffy, popped kernels to pass through easily while leaving the heavier, unpopped “old maids” behind in the bottom of the pot. Simply discard them, and focus on enjoying the perfectly popped goodness!

Dutch Oven Popcorn
Print
Rate
SaveSaved!
Ingredients
- 2-3 Tablespoons cooking oil* see note
- 1/2 cup popcorn kernels
- 1/2 teaspoon kosher salt or seasoned salt
- 1-2 Tablespoons butter
Instructions
-
Add 2-3 Tablespoons cooking oil to your Dutch oven along with 3-4 popcorn kernels. Cover with the lid and heat over medium heat for about 2 minutes or until you hear the kernels pop. This ensures your oil is at the optimal temperature for popping.
-
When you hear the test kernels pop, immediately remove the pot from heat. Add 1/2 cup of popcorn kernels along with 1/2 teaspoon of salt to the pan. Cover with the lid again and return to medium heat. Adding salt now helps it adhere better to the kernels for even seasoning.
-
Cook over medium heat for approximately 2-3 minutes. Shake the pan about every 30-60 seconds to prevent burning and ensure even popping. Once rapid popping begins, slightly vent the lid to allow steam to escape for crispier popcorn. When the pops slow to 1-2 seconds between pops, remove from the heat but leave the lid on for 15-20 seconds to catch any last-minute pops.
-
Remove the lid and transfer the cooked popcorn to a large bowl. Use a large slotted spoon to leave any unpopped kernels (“old maids”) behind in the pot, discarding them.
-
Add 1 or 2 tablespoons of butter (or to taste) to the still-warm pan and melt it. Pour the melted butter evenly over the fresh popcorn, toss well, and enjoy your delicious homemade treat!
Notes
Flavor Innovations and Serving Suggestions for Your Dutch Oven Popcorn
Once you’ve mastered the basic Dutch oven popcorn, a world of flavor possibilities opens up! Popcorn is an incredibly versatile canvas for both sweet and savory toppings, limited only by your imagination. Experimenting with different seasonings can transform a simple snack into an extraordinary culinary experience.
- Sweet Treats: Beyond the classic butter and salt, consider dusting your popcorn with a blend of cinnamon sugar, a sprinkle of cocoa powder, or a decadent drizzle of melted chocolate. For an elevated experience, our Salted Caramel Pecan Popcorn recipe promises an indulgent treat, perfect for special occasions or a luxurious movie night. And for that irresistible sweet-and-salty crunch, don’t miss our Dutch Oven Kettle Corn, striking a perfect balance that’s hard to resist.
- Savory Sensations: Explore a diverse range of spices to elevate your popcorn’s savory profile. Try garlic powder, onion powder, smoked paprika for a smoky depth, or a sprinkle of nutritional yeast for a surprisingly cheesy flavor. For those who crave a tangy kick, our Homemade Dill Pickle Popcorn offers a unique and incredibly addictive zest. And for the ultimate umami explosion, you absolutely must try the Smoky Bacon Popcorn – it’s a true game-changer that will revolutionize your perception of savory snacks!
- Herbal Infusions: For a sophisticated touch, finely chopped fresh herbs like rosemary or thyme, gently mixed with a little melted butter, can add an unexpected aromatic dimension to your snack.
- Cheesy Delights: Grated Parmesan, white cheddar powder, or even a dash of chili powder combined with cheddar cheese powder will transform your popcorn into a cheesy, irresistible delight. Experiment with different cheese varieties for varied flavor profiles.
Homemade popcorn isn’t just a snack; it’s a versatile treat perfect for any occasion. It’s a guaranteed crowd-pleaser for lively family movie nights, an ideal and easy snack for casual gatherings or parties, a healthier and more satisfying alternative to greasy store-bought chips, or simply a quick, comforting indulgence when you need something satisfying. Moreover, having complete control over the ingredients ensures you’re enjoying a wholesome and delicious treat tailored to your preferences.
The Undeniable Benefits of Crafting Your Own Stovetop Popcorn
Beyond the fantastic taste and endless customization options, making your popcorn at home offers several compelling advantages that make it a superior choice:
- Remarkable Cost-Effectiveness: A large bag of raw popcorn kernels is significantly more economical than purchasing microwave popcorn boxes or expensive pre-popped bags. You save money in the long run while consistently enjoying a higher quality product.
- A Healthier Choice: When you make popcorn from scratch, you gain complete control over the ingredients. You can select healthier cooking oils, precisely adjust the amount of salt, and choose your preferred butter. This allows you to avoid the artificial flavors, unhealthy trans fats, preservatives, and questionable chemicals often found in microwave popcorn bags, making it a much cleaner and more wholesome snack.
- Unmatched Freshness and Quality: There’s simply no comparison to the crisp, warm freshness of popcorn made just minutes before you eat it. The texture is consistently perfect, and the flavors are vibrant and pure, unlike the often stale or overly processed taste of commercial popcorn.
- A Fun and Engaging Activity: The rhythmic sound of kernels popping, the anticipation building as the pot fills, and the delightful aroma wafting through your kitchen create an enjoyable and almost therapeutic culinary experience. It’s a simple pleasure that can be a fun and engaging activity for the entire family, creating lasting memories.
- Environmentally Friendly: By making your own popcorn, you significantly reduce waste associated with individual plastic wrappers and cardboard boxes from microwave popcorn. Opting for a reusable Dutch oven is a more sustainable and environmentally conscious choice.
So, the next time that irresistible popcorn craving strikes, bypass the convenience aisle. Instead, embrace the simple, satisfying, and deeply rewarding tradition of making stovetop popcorn in your trusted Dutch oven. It requires minimal effort but yields truly delicious, perfectly popped results every single time. Get ready to delight your taste buds and impress everyone around you with the best homemade popcorn you’ve ever made!
Pin it to save for later!

*I received this cookware for free, but all opinions expressed are genuinely my own.


